

How To Remove Beard In Photoshop Cc

Reducing 5 O'Clock Shadow And Beard Stubble In Photoshop
In this Photoshop photo editing tutorial, we're going to learn how to reduce the advent of v o'clock shadow and beard stubble in a photo.
Of course, if the photograph is of a guy out in the rugged outdoors and he's dressed like he'due south off to wrestle with a mountain king of beasts, you may not want to remove the stubble. But in other types of photos, it may just brand him expect similar he could employ a rest, or maybe he'due south been resting a little besides much, in which instance y'all'll want to remove information technology, or at least reduce information technology. We're going to see how to exercise that here.
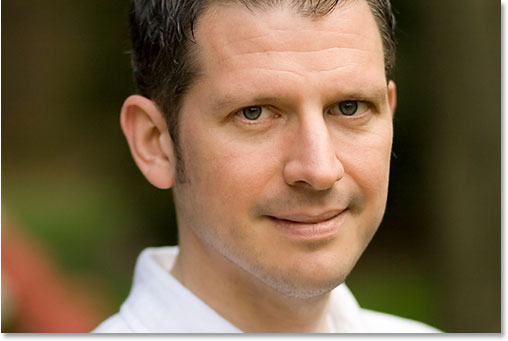
Here's the paradigm I'll be using for this tutorial:

And here's how he'll wait when we're washed:

This tutorial is role of our Portrait Retouching drove. Let's get started!
Shortcodes, Actions and Filters Plugin: Error in shortcode [ads-photoretouch-middle_2]
Stride one: Duplicate The Background Layer
The kickoff thing I always practise is duplicate my Groundwork layer so that I don't run the gamble of losing my original paradigm information. Right now all I have in my Layers palette is my Groundwork layer:
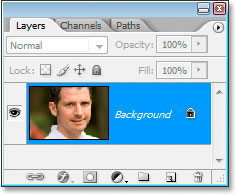
Photoshop's Layers palette showing the Background layer.
I'm going to apace duplicate the Background layer using the keyboard shortcut Ctrl+J (Win) / Command+J (Mac), and now I accept two layers - the original Background layer on the lesser and the re-create above information technology:
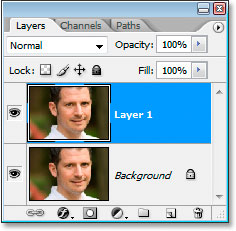
Press "Ctrl+J" (Win) / "Control+J" (Mac) to duplicate the Groundwork layer.
Step 2: Use The "Dust & Scratches" Filter To Blur Away The Stubble
Go up to the Filter menu at the acme of the screen, select Noise, and then select Dust & Scratches, which brings up the Grit & Scratches dialog box. We're going to utilize information technology to mistiness away the stubble.
To do that, increment the Radius value until the stubble is no more. Here, I've used a Radius value of four pixels:
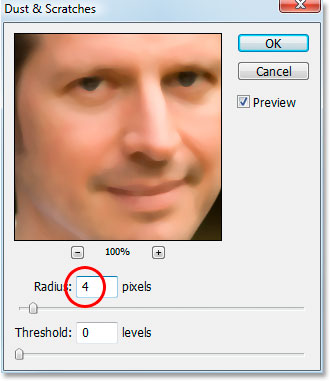
Increment the Radius value in the Dust & Scratches dialog box until at that place'due south nothing left of the stubble.
Yous're going to end up blurring out the entire photo at this point, just that's okay. Ignore the rest of the photo and focus only on the stubble areas. Once you've smoothed those areas out, click OK.
Hither's my paradigm after applying the Dust & Scratches filter:
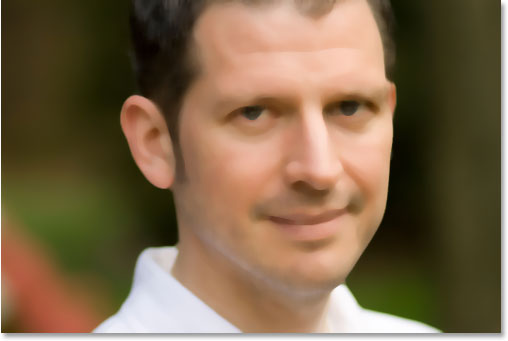
The image in Photoshop after applying the Dust & Scratches filter.
Step 3: Create A Design From The Paradigm
We're going to create a blueprint out of the blurred prototype. We'll be using the pattern with the Healing Brush in a moment, but for now, go up to the Edit menu at the peak of the screen and cull Define Blueprint.
This volition bring upwardly the Pattern Name dialog box. Get ahead and name it whatever you similar. I've named mine "stubble":

Cull Edit > Define Pattern, then proper name your design.
Click OK once yous've entered a proper noun, and the pattern is created.
Footstep 4: Undo The "Dust & Scratches" Filter
We need to revert the paradigm back to the mode information technology was earlier we applied the Dust & Scratches filter at this point, and then to do that, use the keyboard shortcut Ctrl+Z (Win) / Command+Z (Mac) to disengage the filter.
Step five: Select The Healing Brush And Set up It To Use The Pattern
Grab you're Healing Castor from the Tools palette. Then, up in the Options Bar at the acme of the screen, fix the Source for the Healing Brush to Pattern:

With the Healing Castor selected, set up its Source to "Pattern" in the Options Bar.
Click on the Blueprint preview thumbnail to the correct of the word "Pattern", and then click on the blueprint y'all created to select it. It will be the last design in the listing:
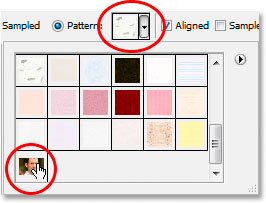
Click the pattern preview area, so click on the blueprint you created to select it.
Finally, make sure the Aligned and Sample All Layers options are selected:

Make sure "Aligned" and "Sample All Layers" are checked in the Options Bar.
Step vi: Add A New Blank Layer
Add a new blank layer using the keyboard shortcut Ctrl+Shift+N (Win) / Command+Shift+N (Mac). This volition bring up Photoshop'due south New Layer dialog box. Proper noun the new layer "healing" and click OK:
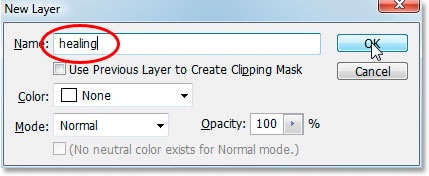
Photoshop's "New Layer" dialog box. Name the new layer "healing".
Yous should at present have a new blank layer named "healing" at the summit of the Layers palette:
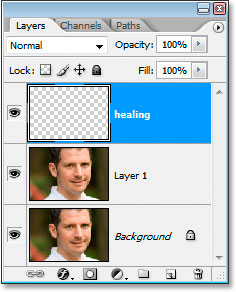
The new blank "healing" layer at the superlative of the Layers palette.
Pace 7: Lower The Opacity Of The "Healing" Layer To 50%
Before we outset applying the Healing Brush to the image, nosotros need to lower the opacity of the "healing" layer, otherwise the healing will be too intense. To practise that, with the "healing" layer selected, go up to the Opacity option in the top correct of the Layers palette and enter in a value of 50%:
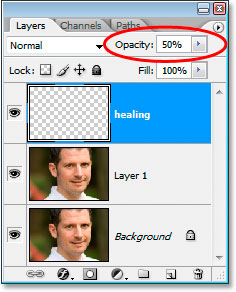
Lower the opacity of the "healing" layer to 50%.
Step eight: Paint Over The Stubble With The Healing Brush
Begin painting over the stubble areas with the Healing Brush. If you demand to change the size of the brush, apply the left and right bracket keys to increase or decrease the brush size as you paint. Continue painting with the Healing Brush until you've covered up all the stubble areas. Use short brush strokes and make sure to release the mouse button after each ane to give Photoshop a chance to use the healing.
Hither's my image after covering upwards all the stubble areas with the Healing Brush:
The image subsequently roofing up the stubble with the Healing Brush.
Step nine: Adjust The Opacity Of The "Healing" Layer If Needed
The homo in the photo I'm using has quite a chip of stubble and information technology's even so showing a bit too much, so I'm going to reduce information technology farther by increasing the opacity of the "healing" layer to about 65%. You won't necessarily need to change your opacity, but increase or decrease it if needed:
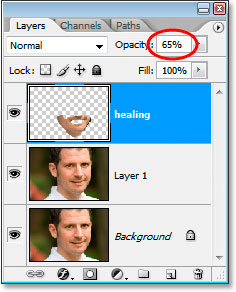
Increasing the opacity of the "healing" layer to 65%.
Hither'south the epitome after increasing the opacity value. The stubble is a bit less noticeable now:

The stubble is less noticeable now after increasing the opacity of the "healing layer".
The problem is, the bottom area of his face is looking a trivial blurry. I'm going to fix that next.
Step 10: Use The "Blend If" Sliders So The "Healing" Layer Just Affects The Nighttime Stubble
Right now, my "healing" layer is affecting non only the man'southward stubble, information technology's also affecting a lot of his pare, causing things to look a bit blurry. What I really desire is for the healing layer to affect only the stubble and leave his skin alone. How can I do that? Well, his stubble is very dark, while his skin is much lighter, which means I should be able to use Photoshop'due south Blend If sliders to limit the "healing" layer to simply the darkest parts of his face, which is the stubble. Permit'due south try information technology.
With the "healing" layer selected, I'k going click on the Layer Styles icon at the bottom of the Layers palette:
Click the "Layer Styles" icon at the bottom of the Layers palette.
Then I'll choose Blending Options from the top of the list:
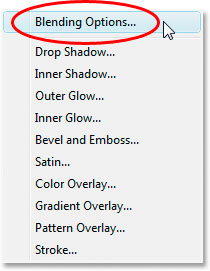
Choose "Blending Options" from the peak of the Layer Styles list.
This will bring up the Layer Style dialog box, set to the Blending Options. The Blend If sliders are found at the very lesser of the center column, directly below the "Avant-garde Blending" options:
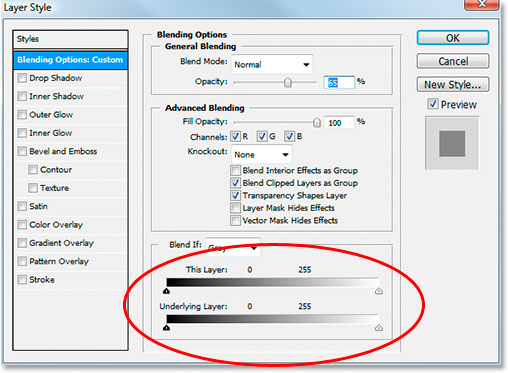
The "Blend If" sliders are at the very bottom of the Layer Style dialog box.
Drag the bottom white slider towards the left. Equally you drag further and further, y'all'll see the original skin texture begin to re-appear in the prototype. Proceed dragging towards the left until the point where the stubble itself begins to show:
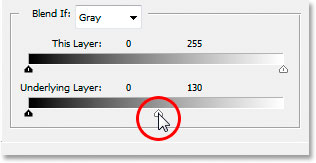
Drag the lesser white point slider towards the left to reveal the original skin texture. Stop when the stubble begins to appear.
Now we need to soften the transition surface area between where the original peel texture is showing and where the "healing" layer begins. To do that, hold downwardly Alt (Win) / Option (Mac) and begin dragging the white slider back towards the right. As soon as yous start dragging, the slider volition split in two and you'll be dragging only the right one-half. Proceed dragging to the right a trivial to create a nice smooth transition surface area. When yous see besides much of the original peel texture beginning to look blurry over again, you've gone too far:
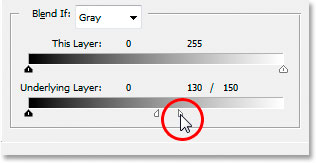
Hold downwards "Alt" (Win) / "Pick" (Mac) and drag the slider dorsum towards the right, splitting it in half and creating a shine transition.
When you lot're happy with how the image looks, click OK to go out out of the Layer Way dialog box, and you're done! Here's my original image once over again:
The original epitome.
And here's my concluding result with some of the skin texture brought dorsum:
The terminal result.
And there we take it! That'southward how to reduce the appearance of 5 o'clock shadow and beard stubble in Photoshop! Bank check out our Photograph Retouching department for more Photoshop epitome editing tutorials!
Other Stuff
© 2022 Photoshop Essentials.com.
For inspiration, non duplication.
Site design by Steve Patterson.
Photoshop is a trademark of Adobe Systems Inc.
Source: https://www.photoshopessentials.com/photo-editing/stubble/
Posted by: barronnessittere.blogspot.com
0 Response to "How To Remove Beard In Photoshop Cc"
Post a Comment